How to create automations on monday.com
Have you ever sat there spending precious time editing your monday.com boards manually? With the automation centre in monday.com, spend less time editing and more time focusing on important tasks with automated alerts, notifications and board additions.s. Automations replace complicated and time-consuming chores with clever automations, either created via template or from scratch.
With over 340 automation templates created by monday.com, you’re sure to find the perfect automation that works for you. From moving completed items to specific groups to automations using connected apps such as Mailchimp and Outlook, monday.com’ automations have got you covered.
What is an automation?
An automation is an action which is completed automatically when a condition is triggered. For example, you get sent a monthly gas bill, it’s processed automatically by an automation which is triggered by a condition, the condition being the last day of every month.. By using the simple click template interface, monday.com allows you to create rules which trigger actions based on predefined conditions, eliminating the drawn-out manual work and reducing the risk of human error within your data.

How do you access the automation centre?
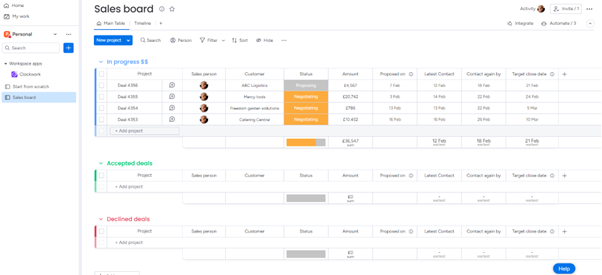
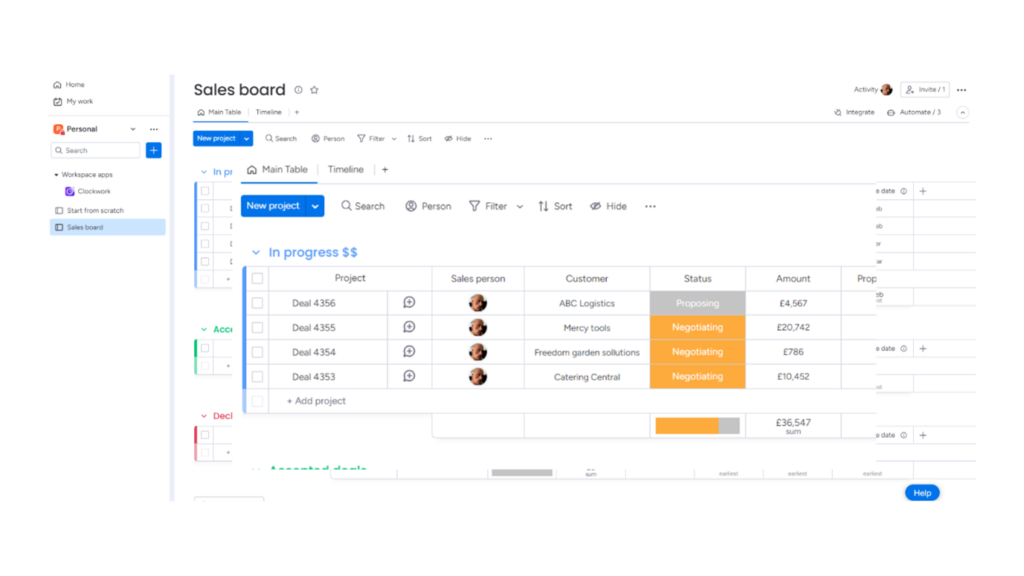
So let’s say you work in sales! You’ve created a sales board to keep track of your leads, who is handling that lead, what amount the deal is for and when that lead should be chased by – you don’t want your leads to go cold.
In the example below, there are a variety of columns to keep you on track, such as a Last Updated column detailing when you last interacted with the customer item, and a Date column with a deadline so that your team knows when the lead should be contacted by. But what if this isn’t enough?
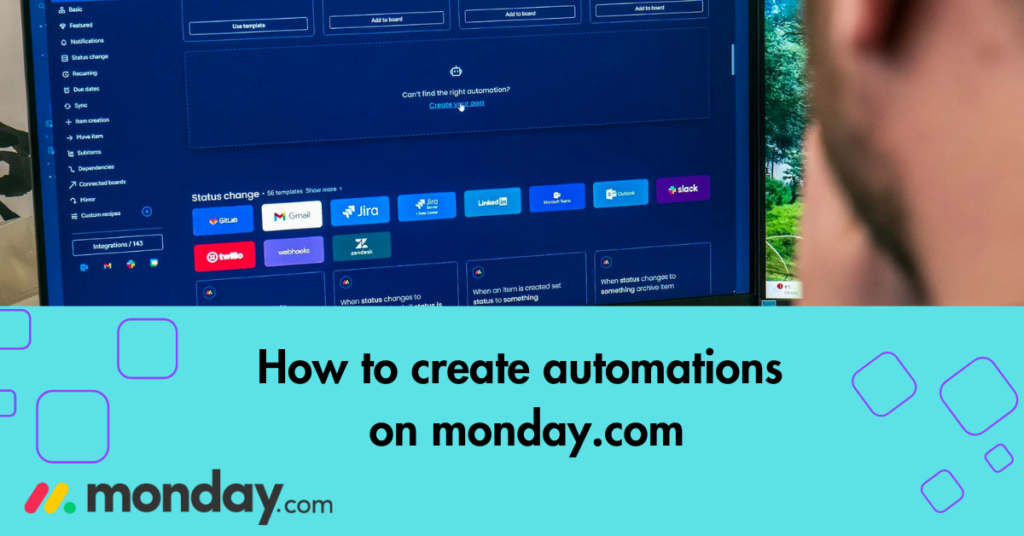
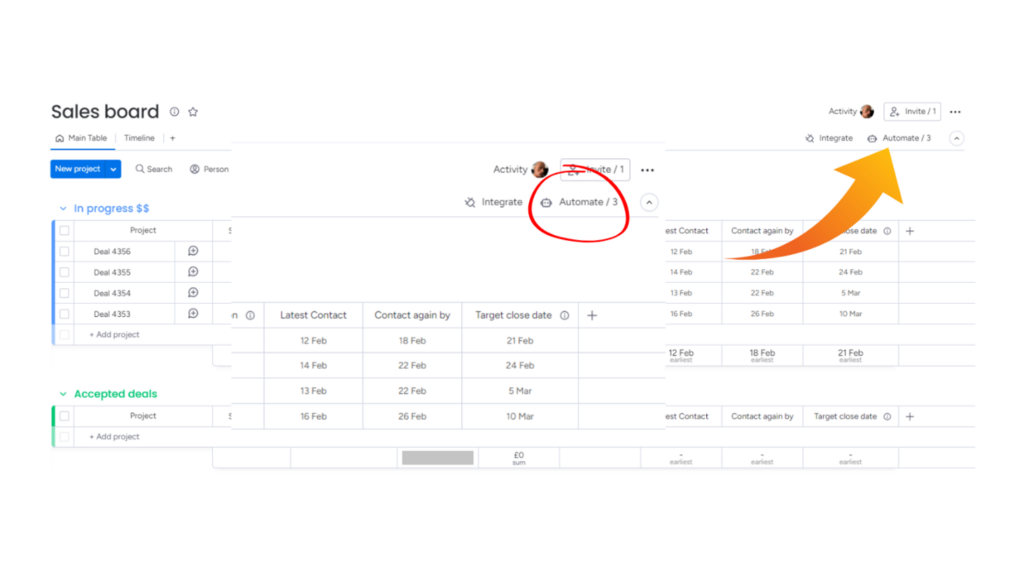
Here’s where automations can help you. Automations can be found at the top right-hand corner of your boards, accompanied by a robot icon. By clicking the automations icon, you’re able to create automated workflows to remind your team to contact your customers and leads.
How to set up an automation
As seen on the example board, we currently have four deals in progress which will need to be nurtured and closely monitored in order to make sure they are closed, and the customers are happy with our service. As we are currently negotiating with three of these customers, we need to make sure that we are nurturing all three equally, making sure they aren’t forgotten about to increase the likeliness of the sale.
To keep your leads warm, you’re able to create an automation which sends a notification reminder to the set salesperson when the “contact again”’ date arrives and the lead needs to be contacted again.
How do we do this?
1. Firstly, select the automation icon at the top right of the board

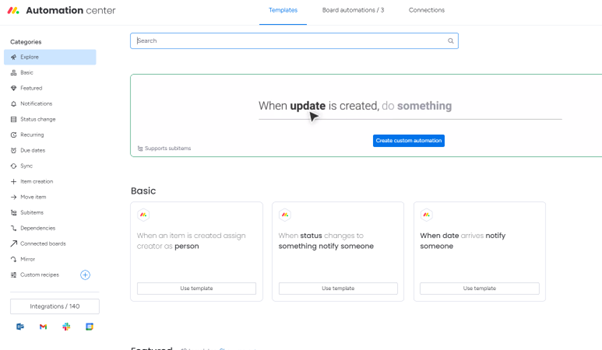
2. You will then be presented by the automation centre view which looks a bit like this.
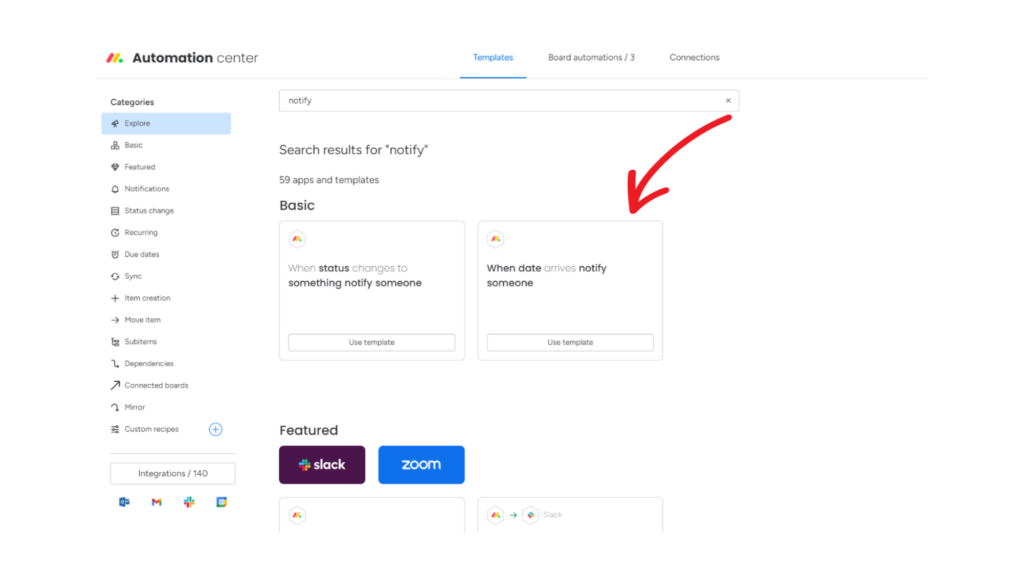
3. For this example, we want to send a notification once the contact again by date has expired. Automation templates are simply automations which have already been created by monday.com. As you type “notify” into the search bar, select “when date arrives, notify someone”. Click “use template”.
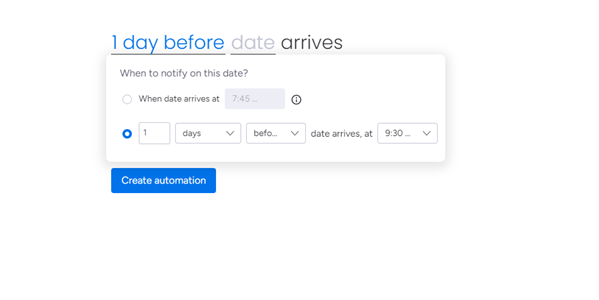
4. Once in the template, you can enter your customized details. To make sure customers are contacted in a timely and respectable fashion, set the reminder to trigger 1 day before the contact again by date is reached at 9:30AM. To do this, select the “when” section and enter the parameters that fit your needs.
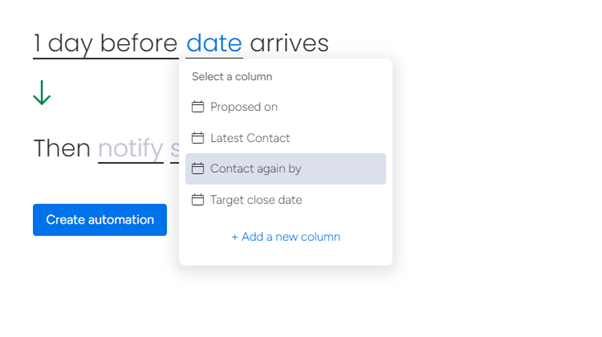
5. Then, select which date column you want to be included in this formula. In this example, it will be the “contact again by” option.
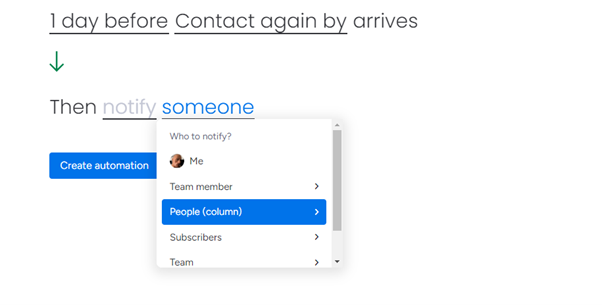
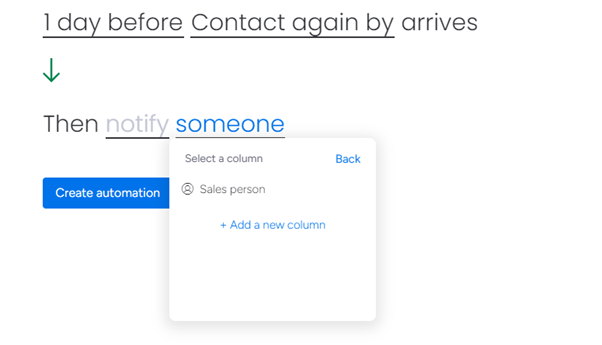
6. Now select who you want to be notified. For the example board board, we want to notify whoever is assigned to the deal. Click the people (column) and then “sales person”. This will then notify whoever is in charge of that case automatically.
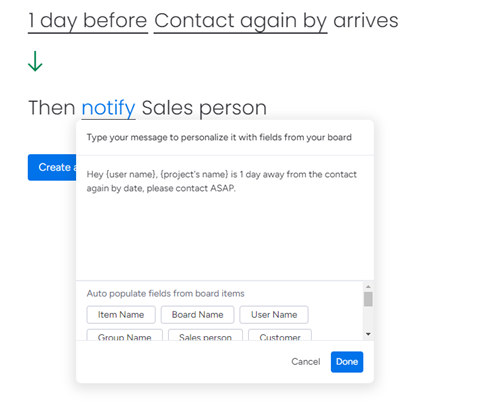
7. You can even personalise the notification t by clicking on the underlined “notify”. When you are happy with your message, click “done” at the bottom right.
8. You are now ready to create your automation! Simply check it over and when you’re happy and press “create automation”.
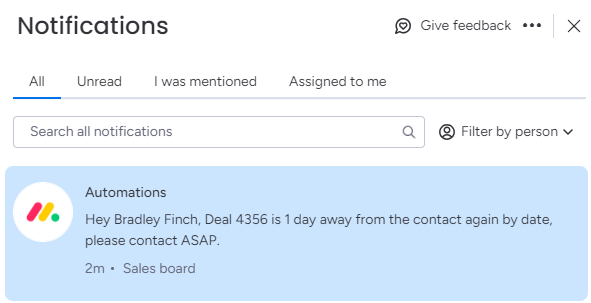
9. You will now see your smooth flowing notifications coming through! You can turn off automations at any time by clicking the automate icon, going to “board automations” at the top and hitting disable or delete.
Automations can be a real aid when introduced into your daily workflow and with over 300 templates, there are endless opportunities within the monday.com system.
If you require any assistance with your monday.com automations, here at enable.services we have experienced professionals in-house who would be more than happy to assist you with any queries you may have.
Or why not get a free 30-minute consultation with our team and see how we can help you improve your system to better suit your needs. Contact us today at info@enable.services or via phone on 01473 618980.