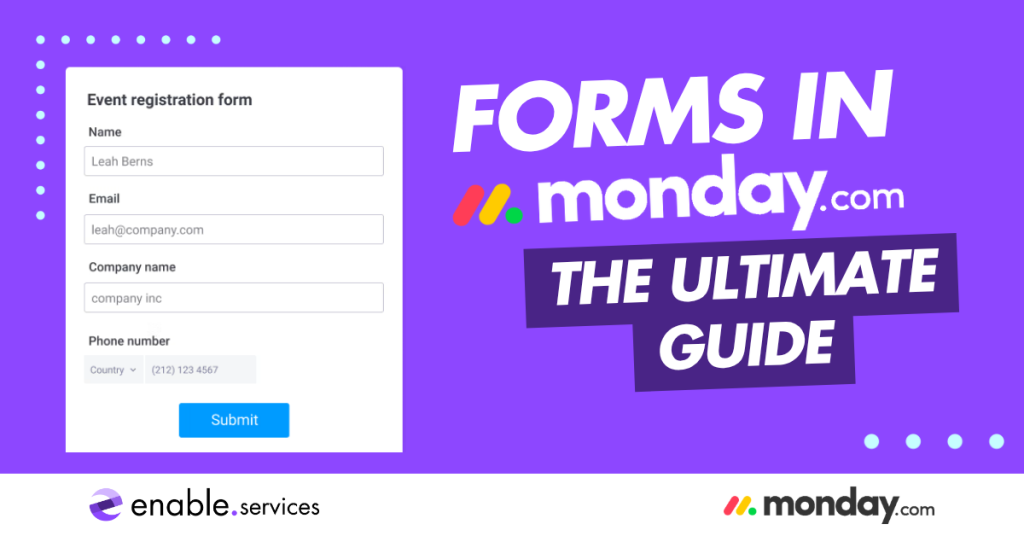
How to create a form in monday.com: The ultimate guide
Forms are essential for businesses to gather feedback, customer enquiries and written reviews. Whether you’re looking to create an extensive feedback form for customers to review a recent purchase, or an internal form for staff to provide their creative ideas, with monday.com, form options are endless.
On monday.com, you can create and customise a variety of different style forms including surveys, contact forms and request forms. Choose from monday.com’s pre-built WorkForm templates, or make your own from scratch for a more personalised touch.
Follow along to learn how to create a custom form on monday.com as we highlight the most useful tools and features.
How to add a form to your monday.com board
To create a form in monday.com, start by adding a new board to your chosen workspace or select the board you’d like to add your form to.
On your board, select the ‘+’ button and add a form.
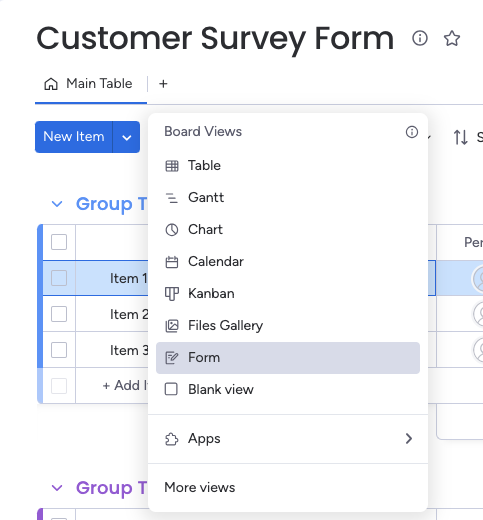
On monday.com, you can create multiple forms on one board. For example, if you wanted to create a form for current customers and another for new customers, monday.com is able to display the submissions in different groups on the same board. To add another form to your board, simply select the ‘+’ button again and add a new form.
Now, it’s time to customise your new board by adding columns.
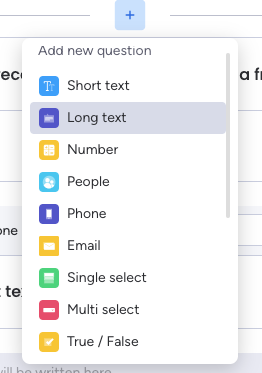
How to add questions to your monday.com form
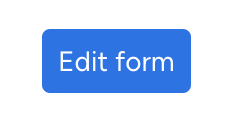
There are two ways to add questions to your monday.com form. You can either add columns to your board and see your changes pull through into your form. Or, you can simply hit “Edit Form” and add sections via the form editor.
monday.com provides a variety of sections to add to your form, but let’s go through the main ones you’ll want to use.
Multi selects and single selects

A Multi Select column, also known as the dropdown in the monday.com board, gives customers the ability to tick multiple answers. For example, you could ask “what areas of our business needs improvement?” and allow users to select multiple options to provide all-round feedback.
If you want to limit form-fillers to selecting one option only, choose the Single Select column. This way, you receive more direct feedback and your overall average will allow you to focus on one area of improvement.
Ratings
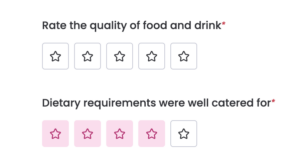
Give your customers the chance to provide a star rating on your services! When you receive a rating on a new form submission, your monday.com board will provide an overall average rating out of five which you can use to determine the quality of your services.
Text fields
If you want a more personalised review or opinion, adding a text area is the perfect way to gather some written feedback! If you want to give your form-filler a large amount of space to answer your question, add the Long Text column so that they’re able to write as much information as they desire.
Signature and customer details
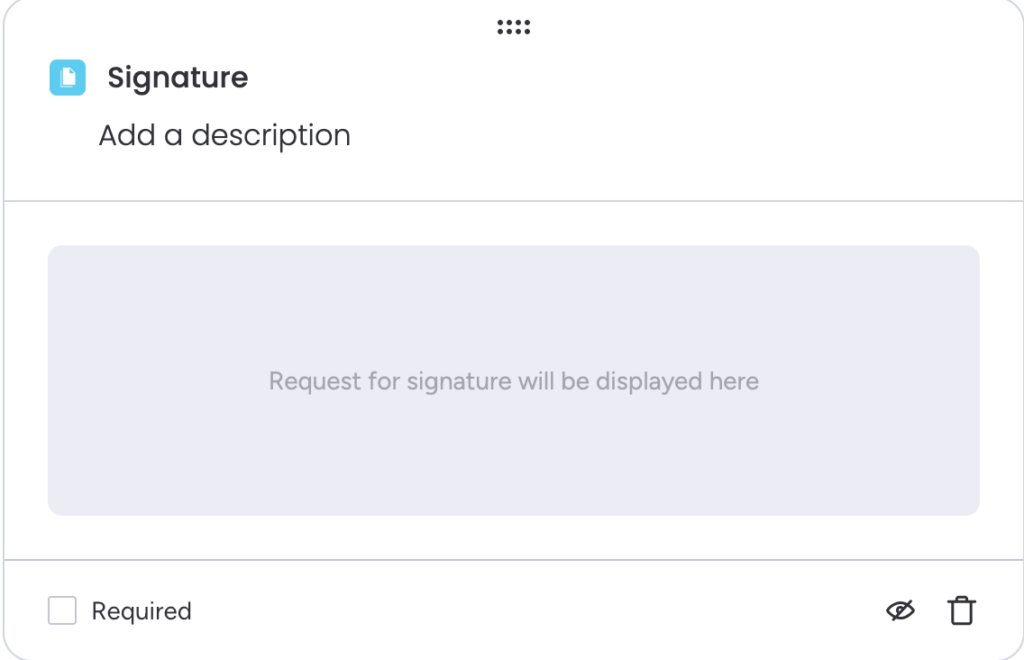
Creating a form that requires a signature? No problem. monday.com allows you to add a signature column, perfect for HR teams and important documents. Any submitted signatures will be added to a files column in the main board, attached as a PNG image file.
If you want to gather customer details in order to generate a lead for your sales team, add a name, email address and phone field. Or, to give users the chance to fill out the form anonymously, don’t tick the required field.
How to create a custom form with a journey
Do you want your form to go on a particular journey? For example, you want to create a product recommendation quiz to help customers find what they’re looking for. This is totally possible on monday.com forms.
When you add a column, tick “add condition” and you can start creating a personal journey depending on what answer the form-fillers selects. To continue your journey, simply select “add another condition”.
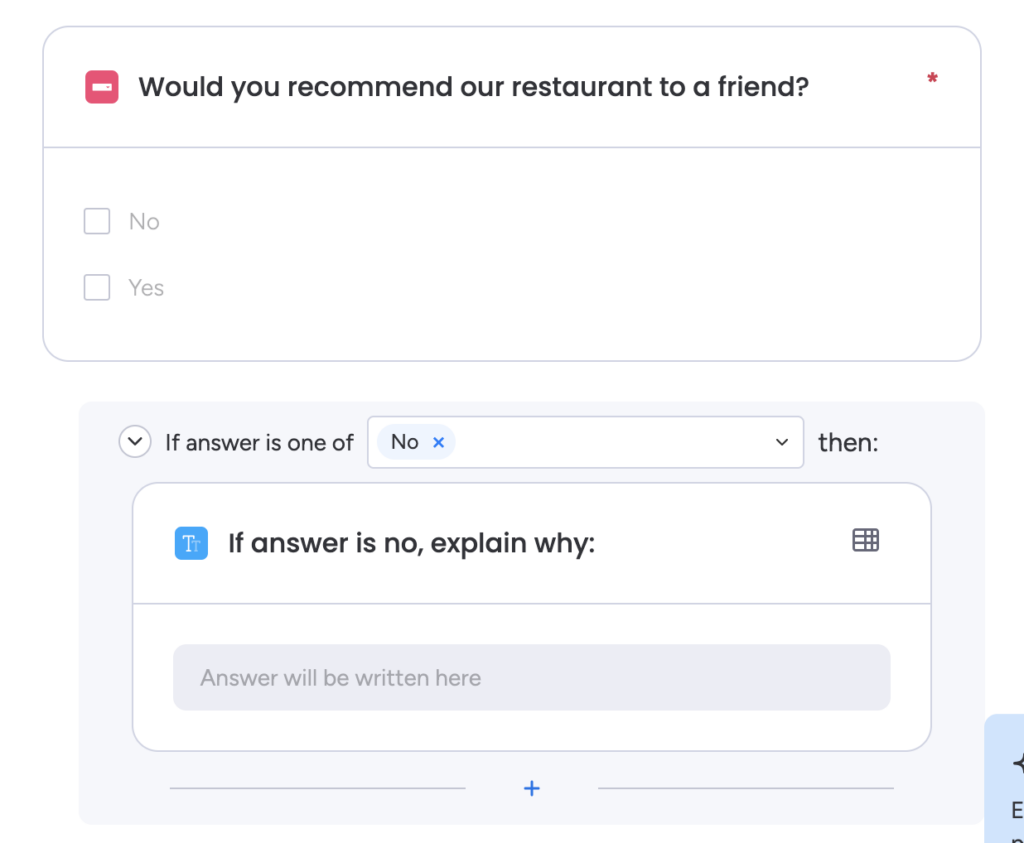
Once your journey is complete, you can end the quiz by adding a link to your recommended product, or simply letting the form submission come through so that you can send a tailor-made response via email.
How to change the design of your monday.com form
Don’t just stick to monday.com’s pre-made design! Take advantage of all the customisation options and edit the form to suit your brand’s look and feel.
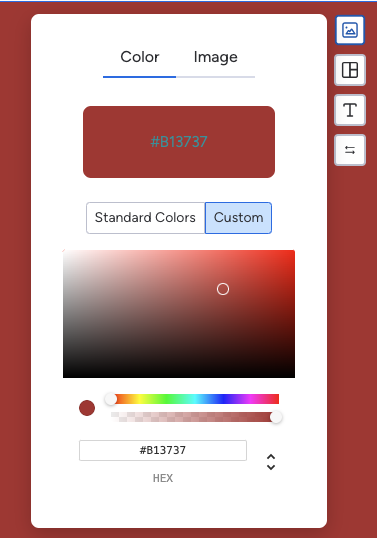
On the right-hand side of your editor, you can change the background colour or image and edit the form’s font. To edit the text on the welcome and thank you pages, head to the Customize tab. On this tab, you can also remove monday.com and WorkForms’ branding to make the form your own.
Creating automations for your form
Before sending your form out to customers, you may want to set-up some automations to keep track of your incoming submissions.
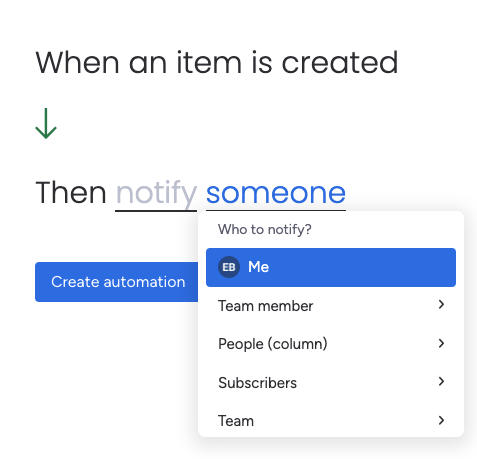
If you want to be notified on monday.com whenever a form is submitted, create the following automation – “When item is created —> Notify”. When a survey is completed, your chosen team member will be notified.
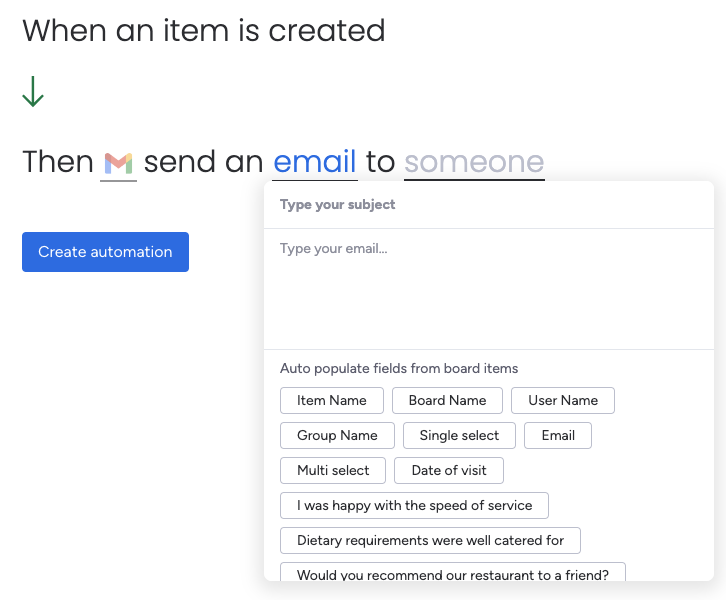
This can be done with your email too! If you want someone to be notified via email when a form is submitted, you’re able to create a Gmail automation and edit the body and subject of the email.
How to send your monday.com form to the public
Anyone can complete a monday.com form, even without a monday.com account. To make your monday form public, select “publish” and choose how you want to share your form. monday.com provides a custom link which you can send out, or attach to a button on your website.
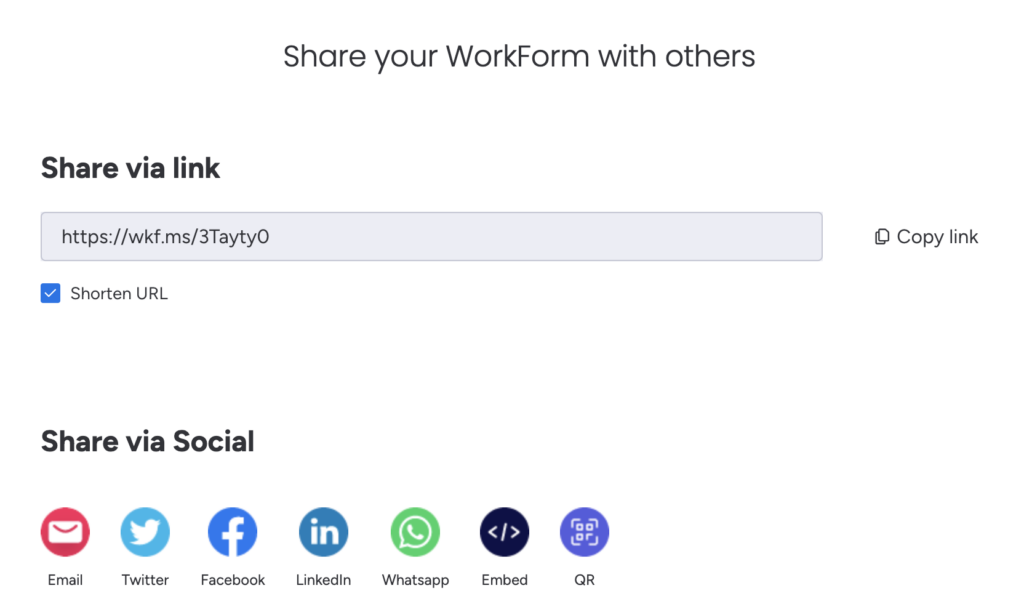
There are many other ways to share your form. You can choose from email, social media, or use the QR code (this one’s great for in-person venues like restaurants and retailers).
How to embed your monday.com form on your website
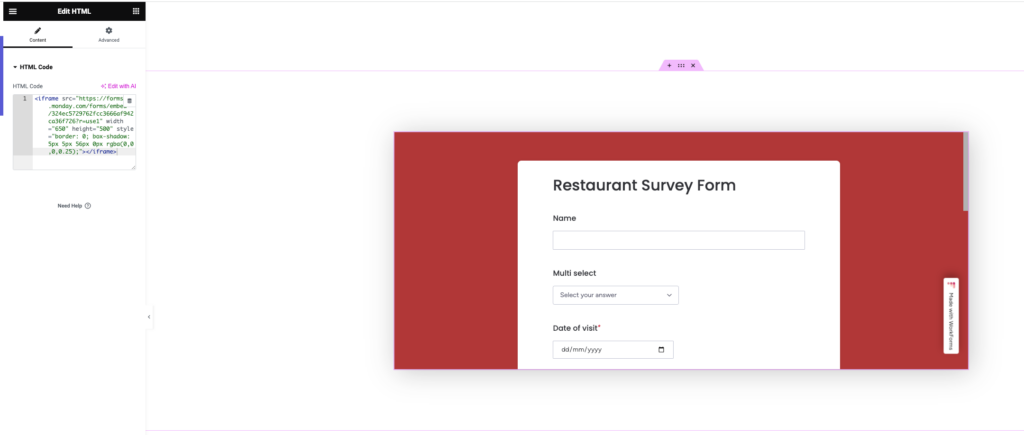
monday.com provides the HTML code to add your form to your website. In the sharing section of your monday form, select “embed” and copy the custom code provided.

When you paste the code onto your website (our example uses WordPress Elementor), your monday.com should now appear on your chosen page. By removing monday.com’s logo and editing the form to suit your brand guidelines, your form should blend into your website’s design.
Where to find monday.com form submissions
So, you’ve sent out your monday.com form… but where in the world do you find the submissions?
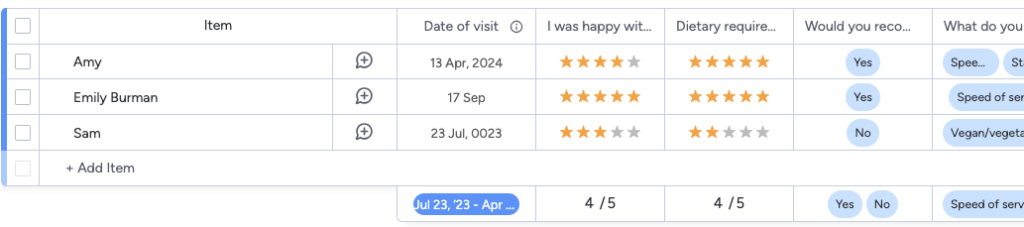
Once a form is submitted, it should appear in your board with each answer under the specified columns. At the bottom of your board, an average will be estimated for rating and dropdown columns, so that you can get a roundup of all your submission responses.
If you want to view your submissions from a more visual perspective, you can open the Form Response Viewer to read each submission one by one. monday.com also creates charts and graphs based on your form submissions, so that you gain a visual representation of your business feedback.


Celia ojeda
is there an option that will allow our customers to print a copy of the questionnaire (PDF) for their files? I see that option on our end once a form has been submitted.
Emily Burman
Hi there. There isn’t a way for the person filling in the form to have the option to print the information they just provided.
However, you could have it so that the form generates a document with Docugen and then emails it to the person filling in the form.
Please let us know if you need further help.